

Last Updated: November 19, 2026
Quick Summary
Upgrading your road bike groupset improves shifting when the drivetrain is worn beyond adjustment or you want more gears, a wider range, or electronic shifting. Diagnose cables, chain wear, and hanger alignment first, because a tune-up or selective replacement often fixes poor shifting for far less.
Before spending money on a road bike groupset, diagnose the actual cause of your shifting problems. Most sluggish shifts trace back to worn cables, a stretched chain, or a bent derailleur hanger, not to a component that needs replacing outright.
Start with the cheapest checks first. That order saves you money and tells you whether an upgrade is even necessary.
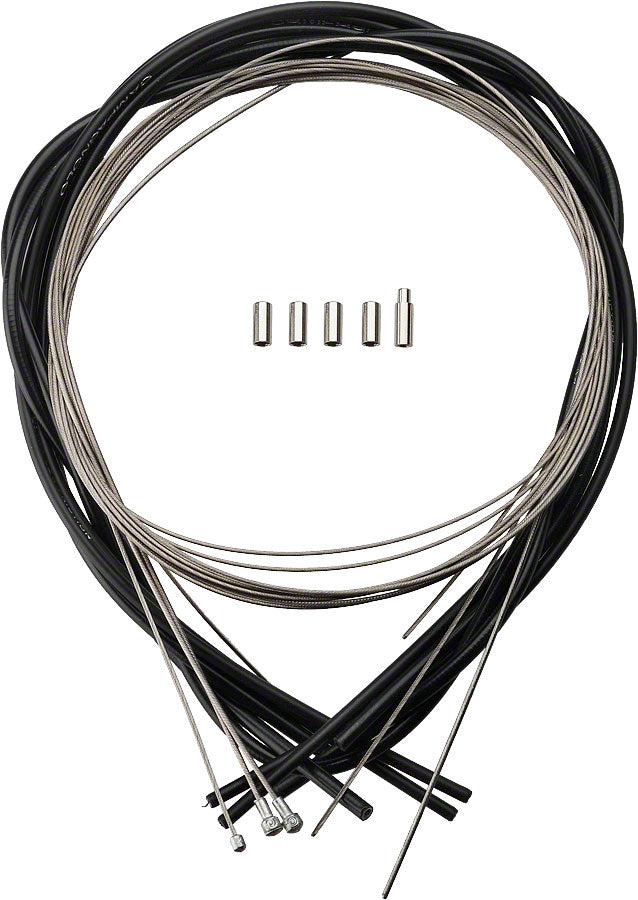
Grit and corrosion inside the housing create friction that no amount of barrel adjustment can fix. Shift into the smallest cog, then click once and watch how the derailleur responds. A delayed or sticky shift points to drag in the line. Inspect the housing ends for fraying and the cable for rust. A fresh cable and housing set restores crisp indexing, and if you want low-friction components for the job, our Campagnolo cable and housing set is built for brakes and derailleurs.
Indexing comes next. Count your clicks against your cog count, then fine-tune cable tension with the barrel adjuster. A quarter turn at a time is enough.
A chain that has stretched past its service limit will wear the cassette and chainrings to match. Check chain wear with a dedicated gauge before you blame the derailleur. Hooked or shark-fin-shaped teeth on the cassette and chainrings confirm the wear has spread. Our Sunlite chain checker makes this a two-second check instead of a guess.
Watch out: installing a new chain on a worn cassette causes skipping under load, so measure both before buying either.
A tune-up fixes shifting when the components are healthy but out of adjustment. A groupset upgrade makes sense when wear, compatibility limits, or your riding goals have outgrown the current setup. The decision comes down to three questions:
If the answer to the first question is yes and the other two are no, a tune-up or selective replacement is the smarter spend. If you are chasing smoother, more reliable shifting across a wider range, an upgrade earns its cost.
A common mistake is replacing the whole groupset when only the chain, cassette, and cables are tired. Those three parts do most of the shifting work.
Most riders budget for the parts they can see and forget the costs that follow. A realistic total cost of ownership includes four buckets:
A partial upgrade, keeping the crankset and changing only the rear half, can cut the parts and labor buckets substantially if compatibility allows. Compare that total against the cost of a replacement bike only when the frame itself is the limiting factor; if the frame is sound and compatible, a selective upgrade usually wins on value.
A tune-up is the better spend when the chain is within its wear limit, the cassette teeth are square rather than hooked, and the cables move freely. In that case, indexing, cable tension, hanger alignment, and limit-screw adjustment restore crisp shifting without new parts. If a single component is worn, usually the chain, replace it early rather than waiting for it to wear the cassette and chainrings to match.
Watch out: replacing the whole groupset to fix a shifting problem that a cable and housing refresh would solve is the most common overspend we see. Diagnose first, then price the fix.
Road bike groupset compatibility is the step most riders skip, and it is where upgrades go wrong. A checklist is only useful if you know how to verify each line, so work through the checks below in order and confirm each one before you order a single part.
Rear spacing and axle standard. Measure the distance between the dropouts.
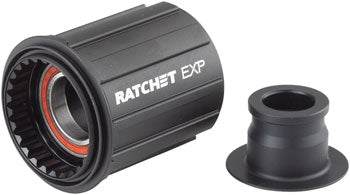
Freehub type. Pull the cassette and identify the driver body. If you are changing hub internals, our DT Swiss Ratchet EXP freehub body fits Shimano HG 11 road setups with a 12 x 142 mm end cap.
Brake mount and rotor clearance. Disc mounts and rim brake mounts are not interchangeable.
Speed and actuation family. Shifters and derailleurs must share the same speed count and the same actuation family.
Bottom bracket shell. Identify the shell width and thread standard, then match the crankset's spindle and bearing interface to it.
Chainline and maximum cassette size. Check the rear derailleur's published maximum cog size against the cassette you want, and confirm the chainline the crankset produces matches the frame.
Cable routing. Route the new cable or hydraulic line before you commit to levers.
Mixed-component upgrades can work, but each junction is a compatibility risk. Cross-tier combinations within one system family are usually the safest, for example, a higher-tier rear derailleur paired with a lower-tier cassette of the same speed and family. Cross-generation combinations are riskier because actuation ratios and pull ratios can change between generations even when the speed count stays the same. When mixing components compromises performance, the usual symptom is a drivetrain that indexes cleanly on the stand but skips or hesitates under load.
Road bike shifting adjustment after installation follows a fixed order, and skipping steps causes ghost shifts later. Work through it methodically:
New cables stretch in the first rides, so expect a follow-up barrel adjustment. If you would rather have it dialed in by hand, our team handles bike repair and service.
A 10-speed to 12-speed road bike upgrade delivers tighter gear steps and a wider range, but it is rarely a cassette-only swap. Twelve-speed systems need matching shifters, derailleurs, chain, and usually a new freehub driver body. Plan the whole drivetrain as one purchase.
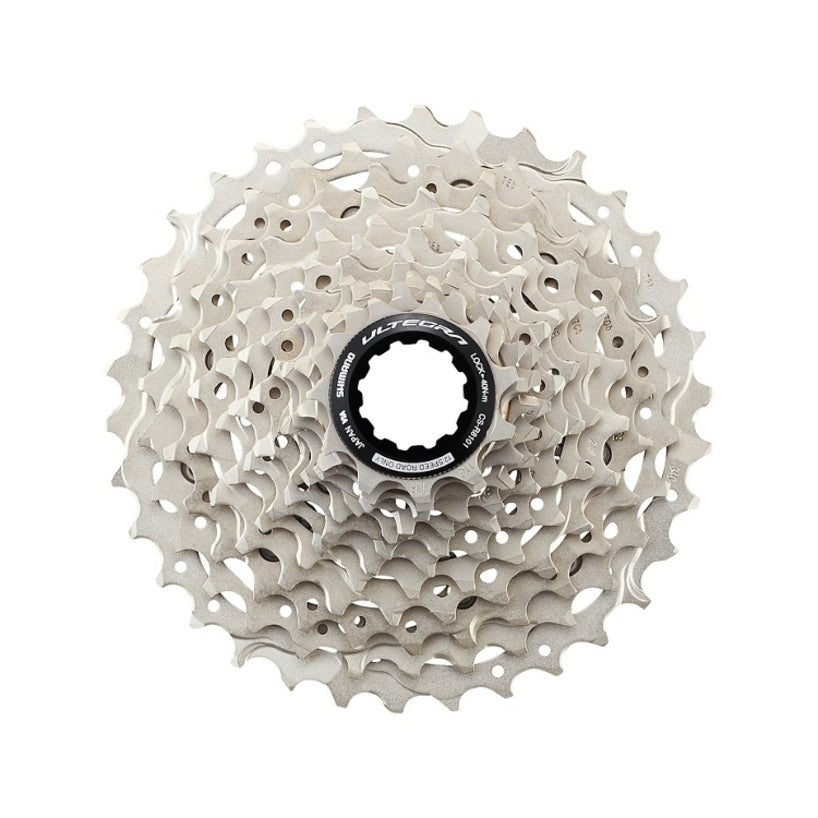
The payoff is real. Extra cogs let you hold cadence on rolling terrain instead of hunting between two gears. If you are building out a 12-speed setup, our Shimano Ultegra 12-speed cassette is a compatible sprocket for HG 12-speed chains.
Budget for the full picture: shifters, derailleurs, cassette, chain, crankset, and labor. Selective upgrades, like keeping your crankset and changing only the rear half, can cut cost if compatibility allows.
Gear ratios decide how the bike feels more than the number of speeds does. A cassette with tight steps suits flat, fast riding; a wider range suits climbing and mixed terrain. Match the cassette to your terrain and fitness, then confirm the rear derailleur's maximum cog size.
Replace in this order when money is tight:
| Priority | Part | Why It Comes First |
|---|---|---|
| 1 | Chain | Cheapest wear item, protects the rest |
| 2 | Cassette | Wears with the chain, restores clean shifts |
| 3 | Cables and housing | Removes friction and drag |
| 4 | Chainrings | Replace when teeth hook badly |
| 5 | Derailleurs and shifters | Last, unless damaged or upgrading |
Replace the chain and cassette together once the chain is worn. Doing one without the other shortens the life of both.
The fastest way to get better shifting is to have a professional confirm what your bike actually needs. If you are also weighing a new frame that suits modern groupsets, our entry-level disc brake road bike guide covers what to look for.
At Playtri Sarasota, our team offers professional bike fitting and expert repair. We offer road, triathlon, gravel, mountain, hybrid, and electric bikes and support riders from first bike to next race.
Poor shifting rarely needs a whole new groupset, but it does need the right diagnosis and a compatible parts list. Playtri Sarasota can check wear, confirm compatibility, and install and tune your components so every shift lands clean.
Start with the cheapest wear items: shift cables and housing, then the chain, then the cassette. A stretched chain or frayed cable causes most poor shifting, and replacing them costs far less than a new road bike groupset. Inspect chainrings and derailleur pulleys next. Only move to a full groupset upgrade when the derailleurs or shifters are damaged, or when you want more speeds or a wider gear range than your current setup supports.
Yes, selective upgrades work well when the parts share a compatible system. Shifters, derailleurs, and cassette usually need to match in speed count and actuation, so mixing brands or generations can break indexing. Cassettes and chains are the easiest standalone swaps. If you change shifters, plan on matching derailleurs too. Bring your current setup to a shop so the team can confirm which parts pair safely before you buy.
Not directly. A 12-speed cassette needs a 12-speed chain, a derailleur that handles 12 speeds, and shifters indexed for 12. Your freehub body also has to accept the new cassette, which may mean a different driver body. That makes it a 10-speed to 12-speed road bike upgrade covering most of the drivetrain, not a cassette swap. Confirm frame clearance and freehub compatibility first.
A tune-up fixes shifting that was fine and drifted: cable stretch, housing drag, a bent derailleur hanger, or worn chain and cassette. A groupset upgrade makes sense when components are worn past saving, crash-damaged, or when you want more speeds, electronic shifting, or a wider gear range. If a fresh cable, chain, and indexing session restores smooth shifting, you likely do not need new components yet.


Leave a comment