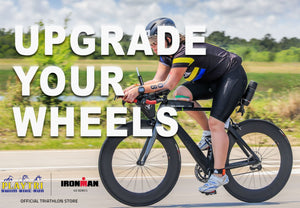

Great ROI for Free Speed
Improving your transitions may be the easiest way to gain speed in your next triathlon. Many coaches refer to this as “free speed” – a great Return on Investment (ROI). If you are looking to take 3-5 minutes off your overall race time, this article is for you.
The transition between the Swim Exit and the Bike Out (referred to as T1) and the transition between Bike In and the Run Out (referred to as T2) are great opportunities to gain free speed. Expert and/or seasoned triathletes understand this and practice flowing through transitions as quickly as possible. Athletes newer to the sport are often shocked by how much time they spent in T1 and T2 when reviewing their overall race performance. It can be disappointing to see hard earned performance improvements simply evaporate in transitions. For example, those precious minutes shaved off your swim time after months of focused pool and open water swim training can be completely lost if you were not intentional about practicing your transitions. Whether you worked hard to improve your swim, bike, and/or run time, you don’t want to lose that time in transition.
Below are a few tips to help you gain free speed in your next triathlon. While there are many additional ways to improve your time in transitions including more advanced techniques like having your bike shoes already attached to your bike, practicing faster bike mounting and dismounting techniques, the tips below can be used by triathletes of all levels.
Athletes Guide
Read the athletes guide or the race details on the race website. These always include information related to transitions. I encourage the athletes I work with to read the Athlete Guide 4 times each day leading up to race day. When my first triathlon coach told me to do this prior to my first triathlon, I thought she was exaggerating. It turned out to be a great way to help me visualize the entire race. The athletes guide will also provide important information regarding more complex transitions for long distance triathlons.
Keep it simple
The key is to only have what you need in transition. If you bring everything you think of for every continency you could imagine, this leads to a very messy transition area that will slow you down. Use what you have been training with and train with what you will be racing with. Nothing new on race day also means nothing new in your transition area.
Special notes:
- Wear your tri top, tri bottoms, or tri suite from start to finish. Wardrobe changes in T1 and T2 are the biggest time sucks and offer little ROI.
- Lube your wrists and ankles to facilitate getting out of your wetsuit (if using a wetsuit).
- Apply your Chamois cream or Body Glide and sunscreen before the swim.
- Loosen your bike shoes with socks rolled back to the toes in the heel of your shoes (if wearing socks) for quick entry. Left sock in heel of left shoe and right sock in heel of right shoe. This was the best early advice I got from my Playtri coach when I started racing. Your feet are wet. You just finished a long swim. The last thing you want to do is struggle finding and then pulling a pair of socks over your wet feet.
- Untie or loosen your running shoes with socks rolled back to the toes in the heel of your shoes (if wearing socks) for quick entry.
- Make sure to have elastic speed laces on your running shoes and practice using them. Speed laces like the ones from Nathan Sports are inexpensive and can save you valuable time and effort putting your shoes on. Make sure to cut them to the right length for your shoes and practice using them. If they are too long, they will bounce on and off the ground. If they are too short, you will have hard time slipping into your shoes. Again, the key is to practice and shorten the laces until you find the right length for you.
- Have a race belt with your race number and nutrition (i.e. gels) already attached. Race belts are also inexpensive and can really simplify your bike to run transition. Simplification means time savings and less things to think about. For example, I have my race number, a few gels (depending on the length of the triathlon), some sodium pills (based on my sodium needs for the event), and a Halo headband attached to my race belt the night before every event. I don’t have to put anything into the back of my jersey in transition. I know it’s all pre-attached to my race belt.
- Have a plan for your nutrition and hydration. Know how many calories (solids & gels), water bottles, and electrolytes you will need and where you will be putting it. Race morning is not the time to think about your nutrition and hydration plan or how to carry it. There are many options available at your local Playtri store. You should also practice executing and dialing in
your nutrition and hydration plan well before race day. This is a good conversation to have with your Playtri coach.
Keep it organized on Race Day – Sprint or Olympic Distances
Rack your bike, fill your water bottles, and put your water bottles and your nutrition in the pre-decided carriers.
You should be able to have everything you need neatly organized into two rows on a hand towel.
- First row (for T1): Bike shoes (with socks rolled back to the toes) if using socks. Helmet with your sunglasses inside. Sunscreen. Once in T1, put your wetsuit/cap/googles under your bike. Put your bike shoes, helmet, and sunglasses on. Grab your bike and get to the mount line. DO NOT get on your bike until after you cross the mount line.
- Second row (for T2): Running shoes (with socks rolled back to the toes). Race belt with number and nutrition attached and visor (or sweat band) attached. Once in T2, put your shoes on, grab your race belt and GET OUT OF THERE. You could put your race belt on as you are leaving transition. You could put your visor on as you start running. You get the point – get out of transition quickly.
Keep it organized on Race Day – Long Distance Triathlons Ironman and Ironman 70.3 events normally require everything to be in a Bike Bag and a Run Bag. Note that most Ironman events involve checking in your bike, Bike Bag, and Run Bag on a specific day (and time slot) prior to race day.
In these situations, you need to be very intentional about filling these bags. Remember that the first things you put into your bags will be the last things that come out so plan how you fill your bags accordingly. You will typically experience one of two different scenarios (more on that below) that will be specified ahead of time in your Athletes Guide provided by race organizer. The Athletes Guide and pre-race athletes meeting will give you important information about setting up your transitions and so much more. You will be instructed on where and when to rack your bike. You will also be instructed on when and where to place your Bike Bag and Run Bag (and sometimes optional Gear Bag). You will also be given instructions on what to do with your Morning Clothes Bag). Don’t overfill your tires the afternoon you rack your bike. The heat from the hot sun does cause tires to pop.
It’s a scary thing to hear and even more scary, when you show up to your bike in the dark on race morning and see the damage. Rest assured that you will have access to your bike in T1 on race morning (you don’t need to leave them there overnight). That’s when you put your water bottles and nutrition on your bike and check your tire pressure.
Below are the two most common scenarios you will experience at long distance events:
- Scenario 1: T1 and T2 are the same spot and you will have both your Bike Bag and Run Bag at that spot next to your bike. Everything needs to be in those bags when you leave for the swim.
- When you come into T1, put your wetsuit/cap/googles next to your bike wheel, grab your Bike Bag, undo the knot, put on your sunglasses, helmet, and shoes. Don’t forget to quickly put your swim stuff in the Bike Bag you just emptied – quick knot and put bag under your bike. Grab your bike and go. Once you return for T2, rack your bike, empty your Run Bag, put your helmet and bike shoes into the Run Bag, put your running shoes on, grab your race belt, and go.
- Scenario 2: T1 and T2 are different locations. Everything needs to be in those bags in their designated areas when you leave for the swim.
For these and many more reasons, you need to read the Athletes Guide many times before race day. Read it 4 times a day during race week so that it gets locked into your memory.
Practice, practice, and practice
Practice your transitions in real conditions before your race and practice often. Even if you are short on time, you could always set up your transition spot in your driveway, or garage before your next bike and/or run training session. Before you head out on your bike, hose yourself down or jump in the pool. Being careful not to slip, “hurry slowly” to your transition spot and put your socks and shoes on before putting on your sunglasses and helmet and heading out on your ride. It’s very helpful to get used to doing this while wet and under pressure. You don’t even need to ride for very long before making your way back to your transition, dismount your bike, take your helmet and bike shoes off before putting on your running shoes, grabbing your race belt, and heading out for your run.
In summary, you should either be practicing your transitions from one transition area with your bike stuff and running stuff laid out intentionally in two rows on a hand towel next to
your bike OR practicing your T1 and T2 from one or two different locations using the Bike Bag and Run Bag. In all cases, you need to be intentional about your layout (or bag fill) and practice.
Visualization
Visualize the process from Swim Exit to Bike Out and from Bike In to Run Out. Visualization can help you practice your transitions using mental imagery from the comfort of your desk or airplane seat. Visualization is not a replacement for practice, but it does help you improve or solidify your process by rehearsing all of the steps involved in your transitions. The more you do it, the clearer the mental imagery gets and the more automatic and fluid the steps become. Not only will this technique help you get faster, but it will also reduce your stress as you approach race day. You should update your mental video on race morning to include physical features or landmarks to help you find your bike quickly when you exit the swim. Remember your race number but also count the number of bike racks you will run by before turning left or right towards your bike. Is your bike racked in front of unique tree or house that could help you get there faster? If yes, add it to your mental video. The last two steps are very important ones. Make sure to walk/jog the exact path you will use from the Swim Exit to your bike. Visualize putting on your bike socks/shoes, helmet/glasses, take your imaginary bike off the rack, and jog to the Bike Out. Do this ten times. Next go to the Bike In. Walk/jog your imaginary bike from the Bike In to your transition and rack your imaginary bike. Visualize removing your helmet and bike shoes, putting on your running shoes, grabbing your race belt and jog toward the Run Out. Do this ten times. If practicing for a long distance event that requires a Bike Bag and a Run Bag, simply add the opening of your bags into your visualizations and mental videos.
On Race Day
Plan to arrive at transition when it opens. This will give you plenty of time to add air to your tires, load your bike with nutrition and hydration, set up your transition area, visit the toilets before the long line-ups, walk/jog your transitions, visualize your transitions, apply sunscreen and body glide, and warm-up. Plan to be out of transition with your swim cap, timing chip, googles, and wetsuit if using one 30-40 minutes before you jump in the water and get the party started.
Say thank you.
Always thank the volunteers that are dedicating their time to support you, keep you safe, and help you create memories that will last a lifetime. You will find helpful volunteers in and around transitions. No matter how hard you are racing or how tough it gets on the course, smiling and having an attitude of gratitude will always make you feel better.
I wish you a great race season and look forward to seeing you out on the courses. I am pretty sure that I will not be seeing you in transition though because you now know the secrets to getting free speed. Don’t hesitate to reach out if you have any questions about how to quickly and efficiently navigate through transition or to discuss other aspects of your triathlon journey.
Peter Balyta is a Playtri Level II Coach, a USAT Level I Certified Coach, and an Ironman Certified Coach. Peter is committed to helping athletes live the life they want to live. He delivers practical advice to help athletes of all ages and abilities drive superior performance in their training and racing while balancing their family, work, community and fitness goals. Peter brings his 20+ years’ experience as a corporate executive and community advocate to his triathlon coaching. Learn more about Peter at https://www.playtri.com/peter-balyta.